
Best DIY belt squat designs for the home gym

If you’ve ever wanted a belt squat machine for your home gym, this guide is for you. Belt squats are a great option for people with lower back issues. It allows the lifter to work the legs without putting pressure on the spine. The problem is that belt squat machines can cost a small fortune and take up a lot of space. In this article, I’ve rounded up the top DIY belt squat machine designs for the home gym.
There are three belt primary designs: Lever arm belt squat, free weight belt squat, and cable belt squat. If after reading this article, you decide you’d rather buy, you can click on the links below for current pricing.


Lever Arm Belt Squat
1. Lever arm belt squat attached to a power rack - this is one of the easiest to re-create but can be expensive because it requires a lever arm (aka jammer arm or ISO arm). This design utilizes a Rep Fitness lever arm, a chain attached to the power rack that allows the lifter to start the exercise from the standing position, and jerk blocks to elevate the feet, which provides a better range of motion than simply standing on the ground.

📸 posted by u/Nick_12 in r/homegym on Reddit
2. DIY lever arm with a kickstand attached to a power rack - this is a similar concept to #1 with a lower total cost. In this case, the lever arm is replaced by a 4x4. This can also be done with two 2x4’s fastened together. The kickstand is an alternate way to start the exercise from the standing position and has a handle incorporated into it. Jerk blocks are also used in this one to elevate the feet and give a better range of motion.

📸 posted by @kidney_doc_lifts

📸 posted by @kidney_doc_lifts

📸 posted by @craftedhomegym
You can view the tutorial for this design in the video below.
3. DIY lever arm design with kickstand and attached to the wall - a major downside to attaching the belt squat to your rack is that it takes times to set up and tear down. Having it attached permanently saves time. This design utilizes a jammer arm attached to the wall, and the belt squat is attached to that.

📸 posted by @dkj.fit

📸 posted by @dkj.fit
4. DIY Lever arm design with kickstand and fixed handle - similar idea to the previous designs with a slightly different execution.

📸 posted by @pluto2000jg
In order to perform belt squats, you’ll need a good squat belt. These are the two I recommend. I personally use the Spud Inc belt, the padding makes it very comfortable and the quality ensures that it will last a lifetime.


5. Lever arm design attached to a rack, with a square tube and a wheel. This innovative design serves multiple functions - provides a handle, serves as a kickstand, and keeps the movement under control.

📸 posted by @mattialago1989
6. Fully fabricated belt squat and chest supported row - I know, this isn’t something that most people can DIY but it is so cool I just had to add it to the list.
📸 posted by @thorben_sartory
7. DIY belt squat design utilizing a barbell, a power rack, soft loop tie down straps, and Ikea step stools - this design is great because of its simplicity. You can see the full tutorial on Youtube.

📸 posted by @designbuildlift
Free Weight Belt Squat
1. DIY Blet squat platform modeled after the Squatmax MD - I generally do not recommend making DIY versions of patented designs, but I just love how this one looks.

📸 posted by @kurtmorrison

📸 posted by @kurtmorrison
2. DIY belt squat using two plyo boxes and weights hanging from the belt.

📸 posted by @homegymhacksandreviews
3. DIY belt squat using weights on a belt while standing on a large tire. This is a fun option for someone who already has a tire around for tire flips.

📸 posted by @dadshredded
Cable Belt Squat
1. DIY belt squat platform - This design follows mechanics similar to the Rogue Rhino. There is a cable that attached to the belt instead of a lever arm. This platform can attach to any cable or pulley system. This is a low cost solution with a small footprint. The only downside is that it needs to be set up every time you use it.

📸 posted by @kaizendiygym
The full written tutorial can be found on Garagegymexperiment.com or you can watch the video below.
2. DIY belt squat platform connected to a Titan Fitness wall mounted pulley tower - I really love this design because it takes no time to set up, has a small footprint, cost about $200 to make, and utilizes the belt squat buddy to start from the standing position.

📸 posted by @kaizendiygym

📸 posted by @kaizendiygym

📸 posted by @kaizendiygym
The full written tutorial can be found on Garagegymexperiment.com or you can watch the video below.
3. DIY belt squat tower made with an Archon pulley tower - This is actually the inspiration for #9 on this list. In my opinion this is the best design. The wide platform plus the multiple pulley wheels make this top notch.

📸 by u/ninjacobranow

📸 by u/ninjacobranow

📸 by u/ninjacobranow
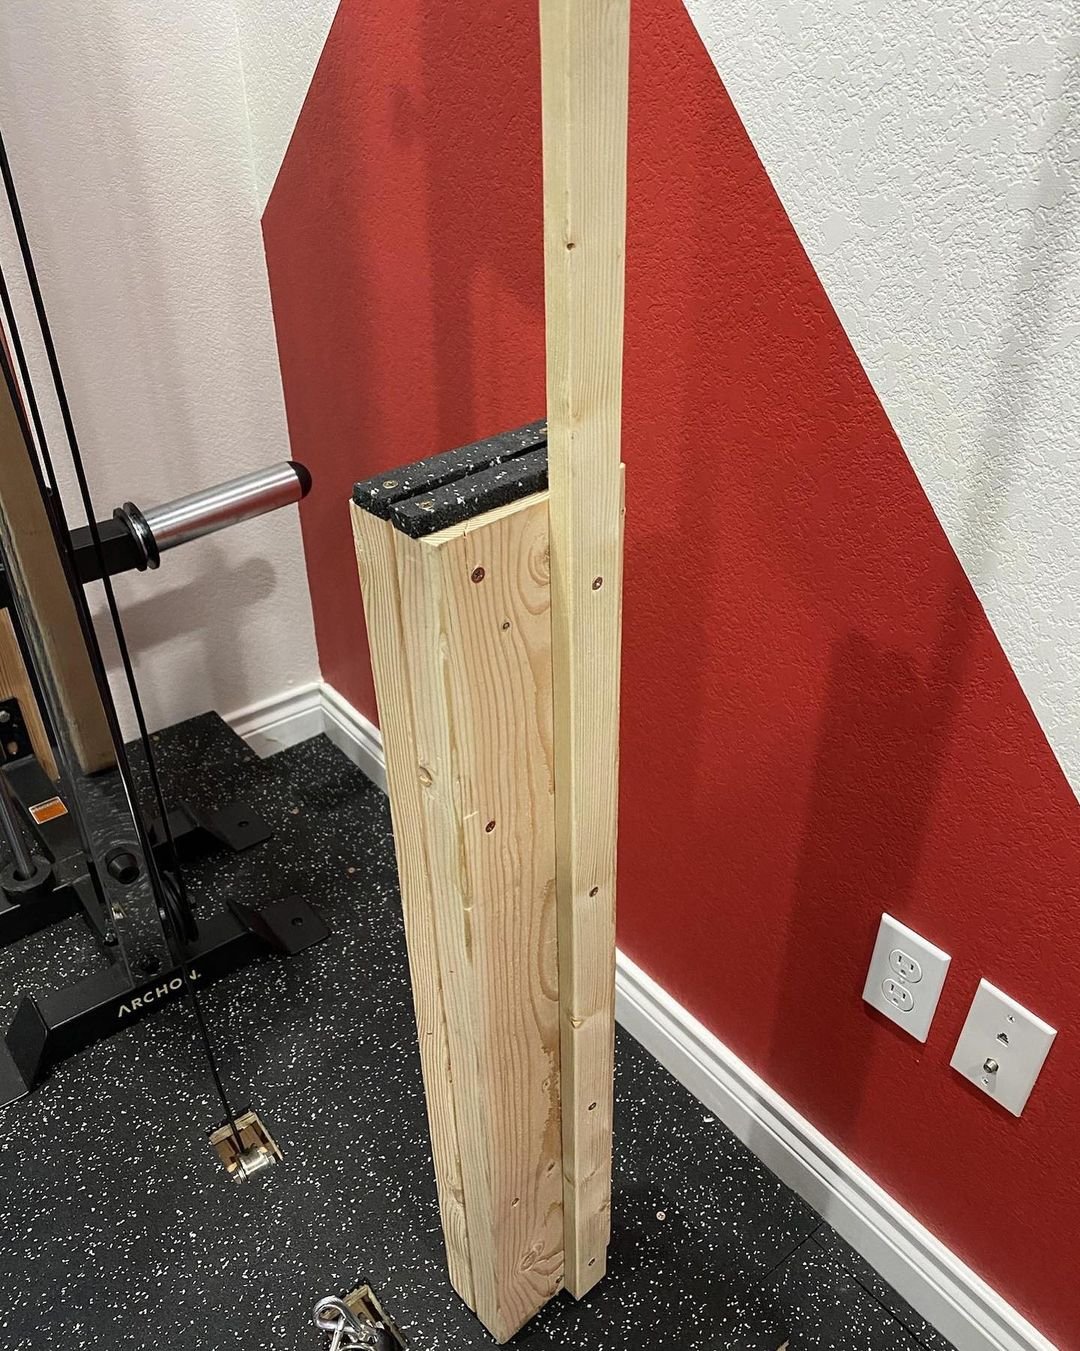
📸 by u/ninjacobranow
A few less conventional but highly functional designs
1. DIY belt squat using a smith machine. This is a great option for those who have a smith machine. The set up is pretty simple.

📸 posted by @homegym.icide
2. DIY belt squat using the leg extension attachment on an adjustable bench. This is a great idea for those who already have the extension attachment. The slight elevation of the feet allows for excellent range of motion.

📸 posted by @fit.annamal
3. Simple DIY belt squat using bands and jerk blocks - This is an inexpensive and very effective option. All you need is bands, a place to secure them, and something to elevate the feet. Just make sure you’re using high quality bands, a broken band would be very painful!

📸 posted by @berserkerlifter
4. DIY belt squat box using a flywheel for resistance - This is definitely the most compact option and it takes little to no time to set up. Flywheel training is different that weight training. It is said to increase the effectiveness of your strength training by applying the inertia of a flywheel instead of simple gravity to create optimal resistance. If you’re interested in building a flywheel, check out the $10 flywheel manual by BBA Performance
For an extensive demonstration of flywheel exercises, check out @stefan.ostling, he has entire page demonstrating the versatility of flywheel training.

📸 posted by @extra.extra.medium